
How to add a status label to your appointment?
To add a status label to your appointment, follow these steps:
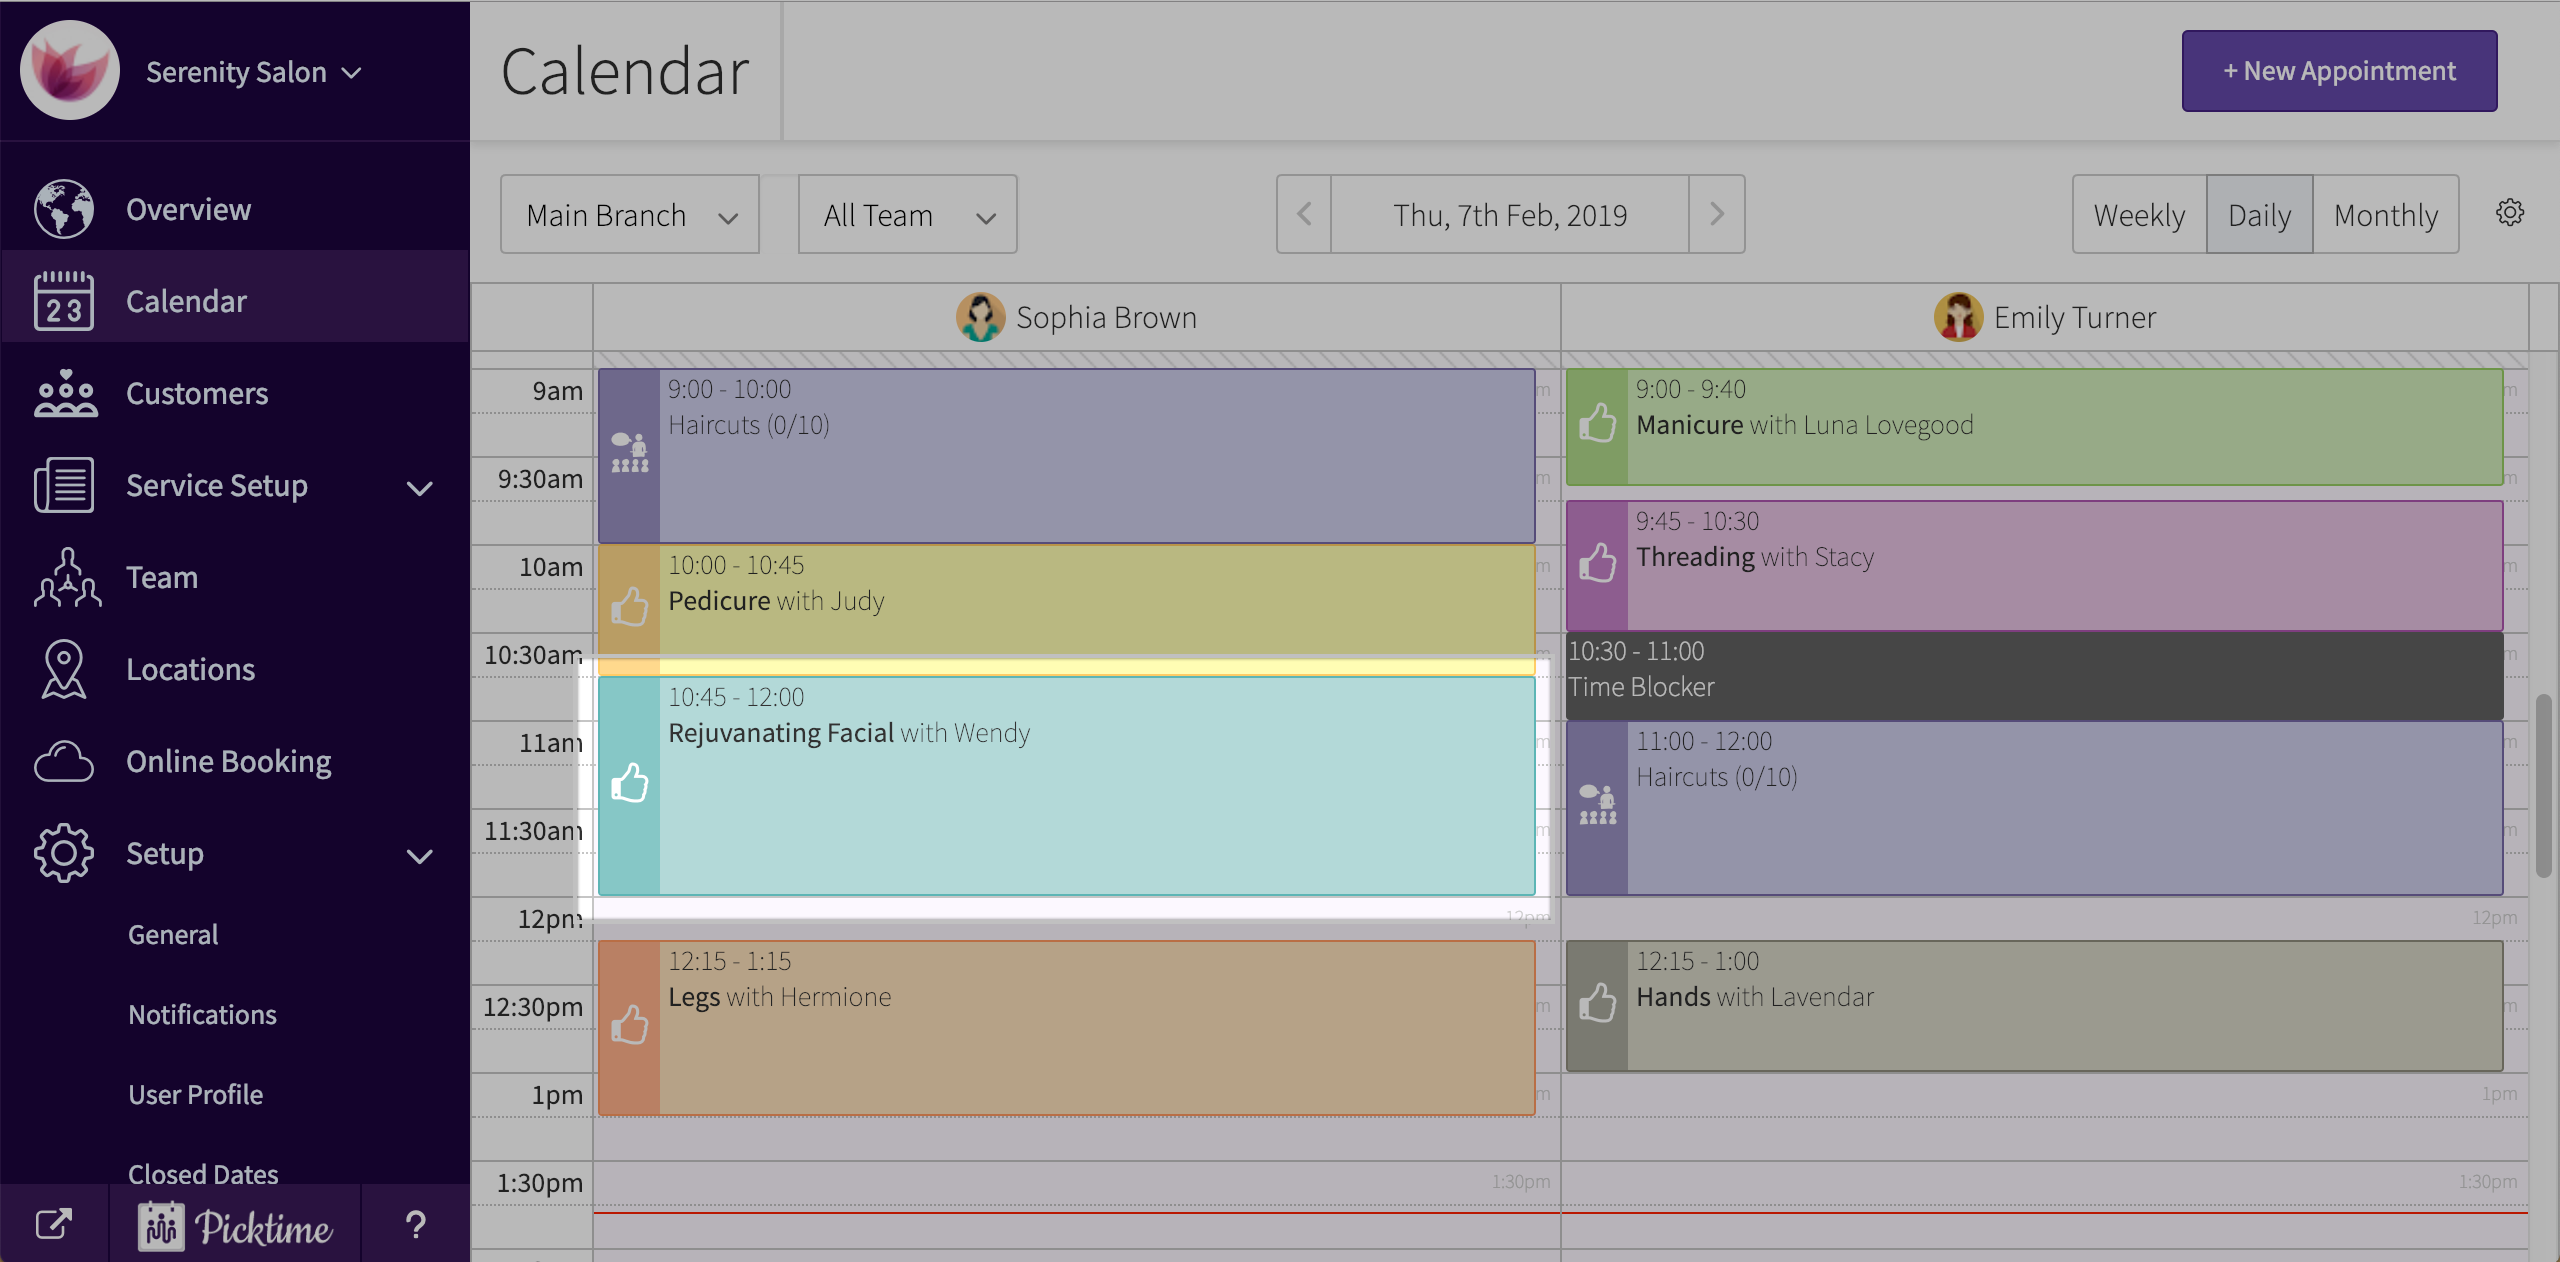
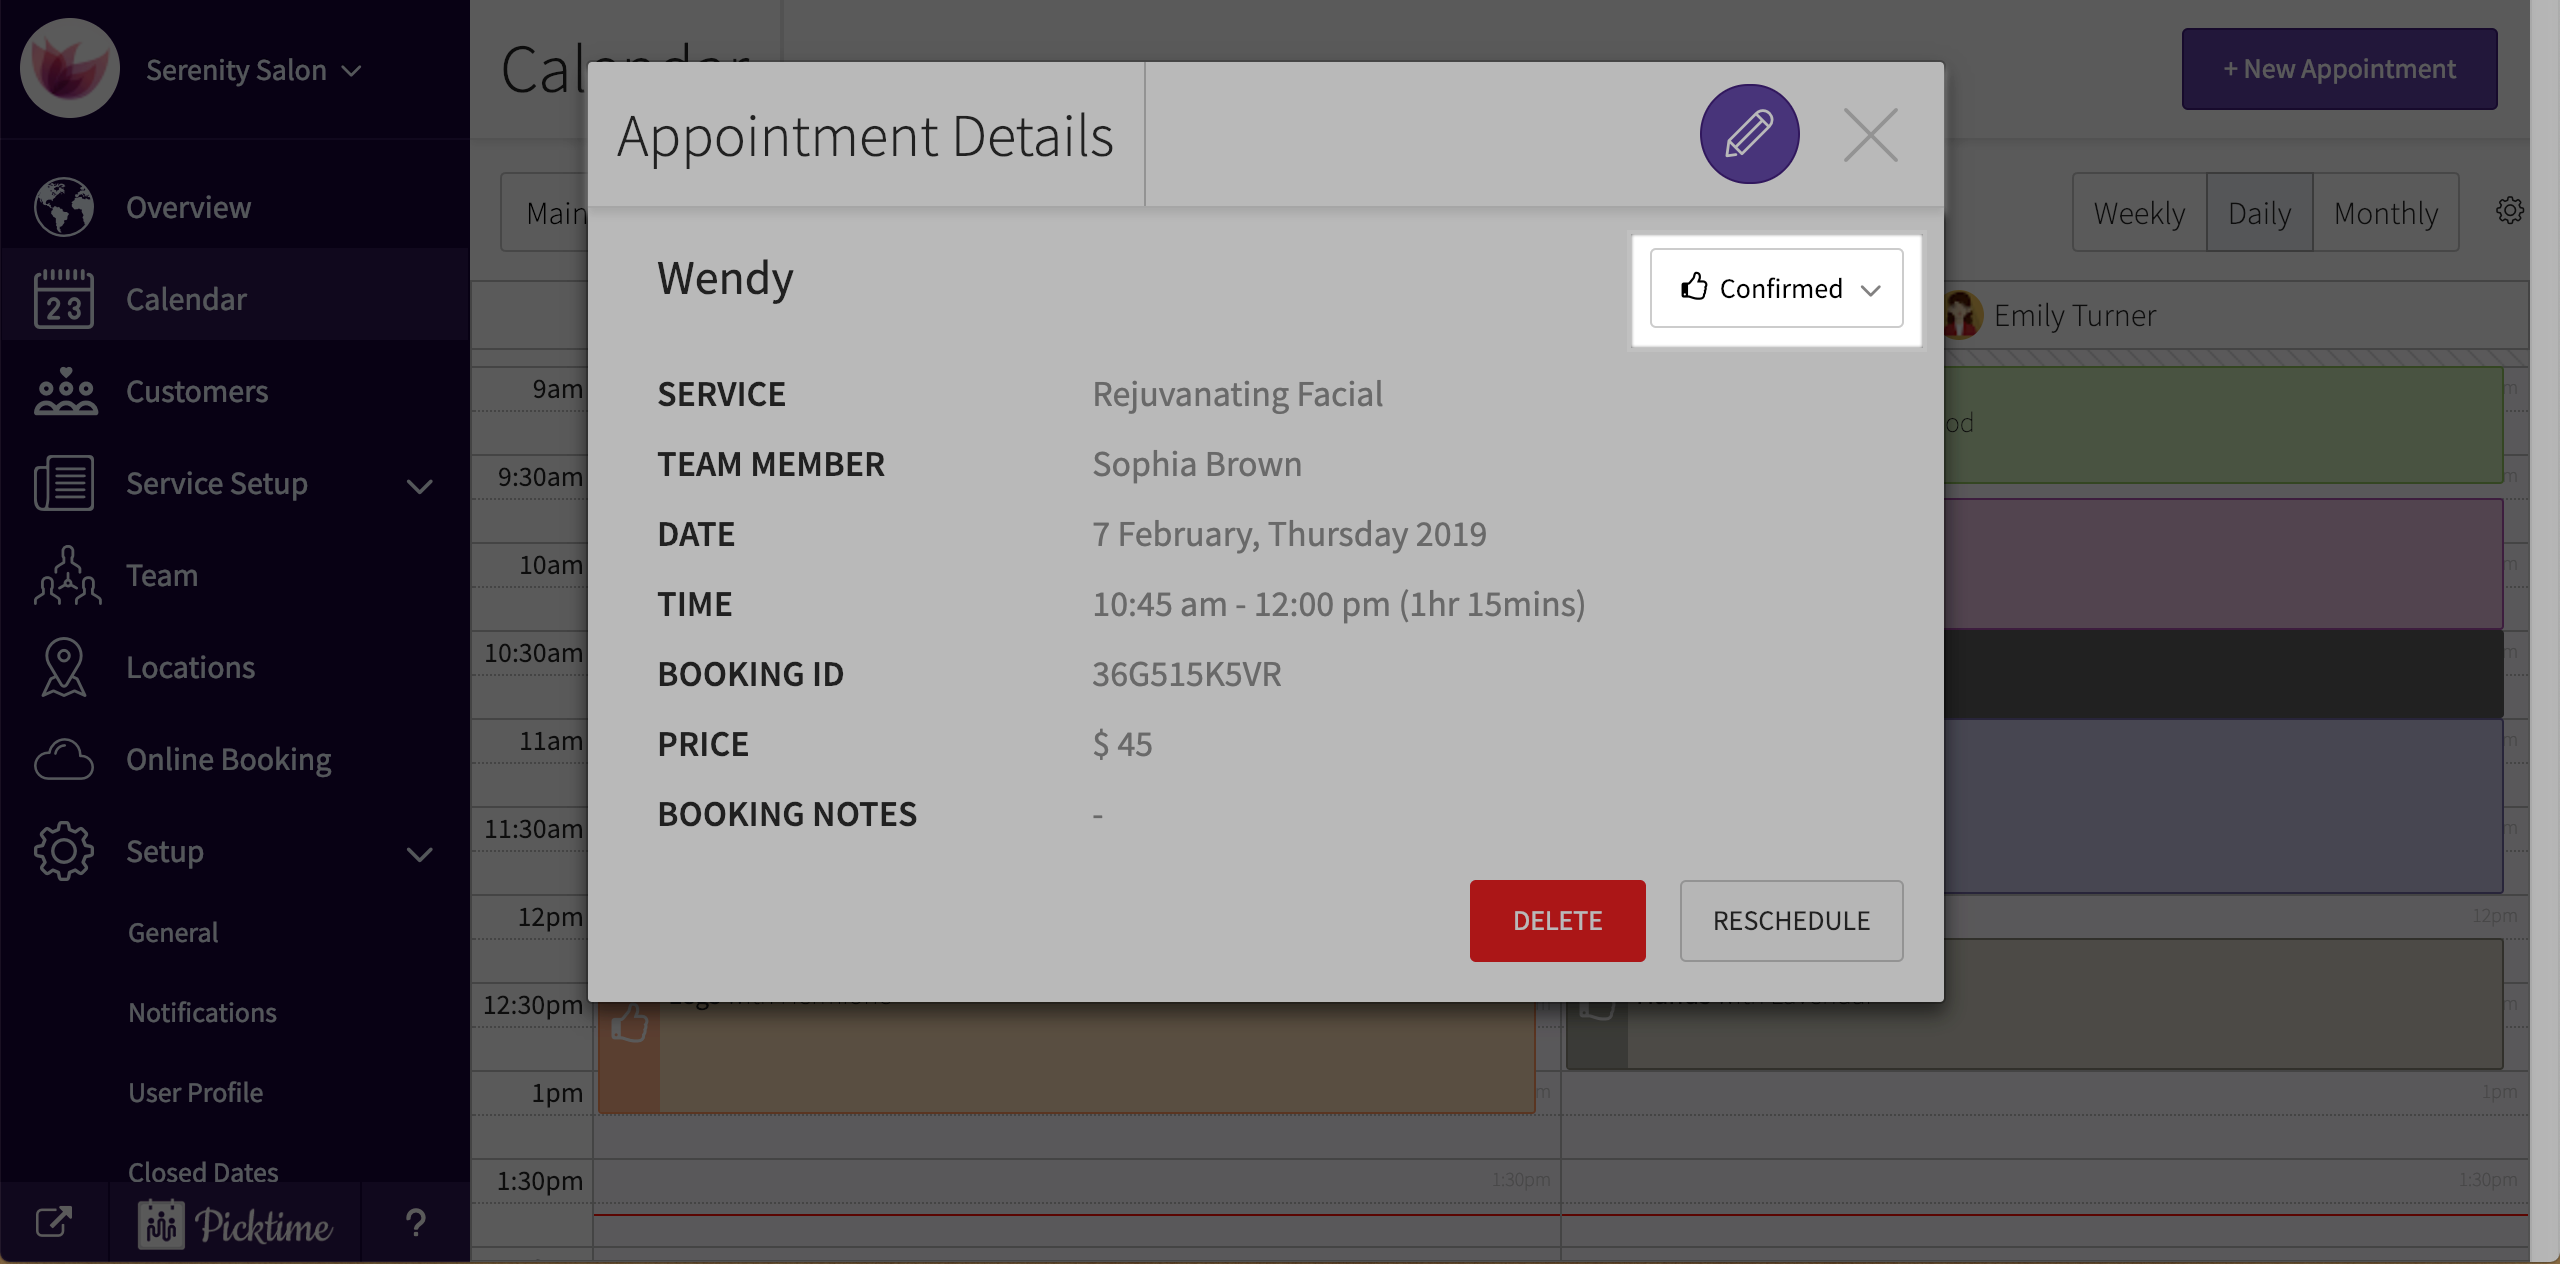
- Click on an appointment scheduled in your dashboard calendar.
- In the pop-up, you will see a dropdown which a status at the top right.
- Click on the dropdown. You will see a number of statuses like new, pending, confirmed, no show etc.
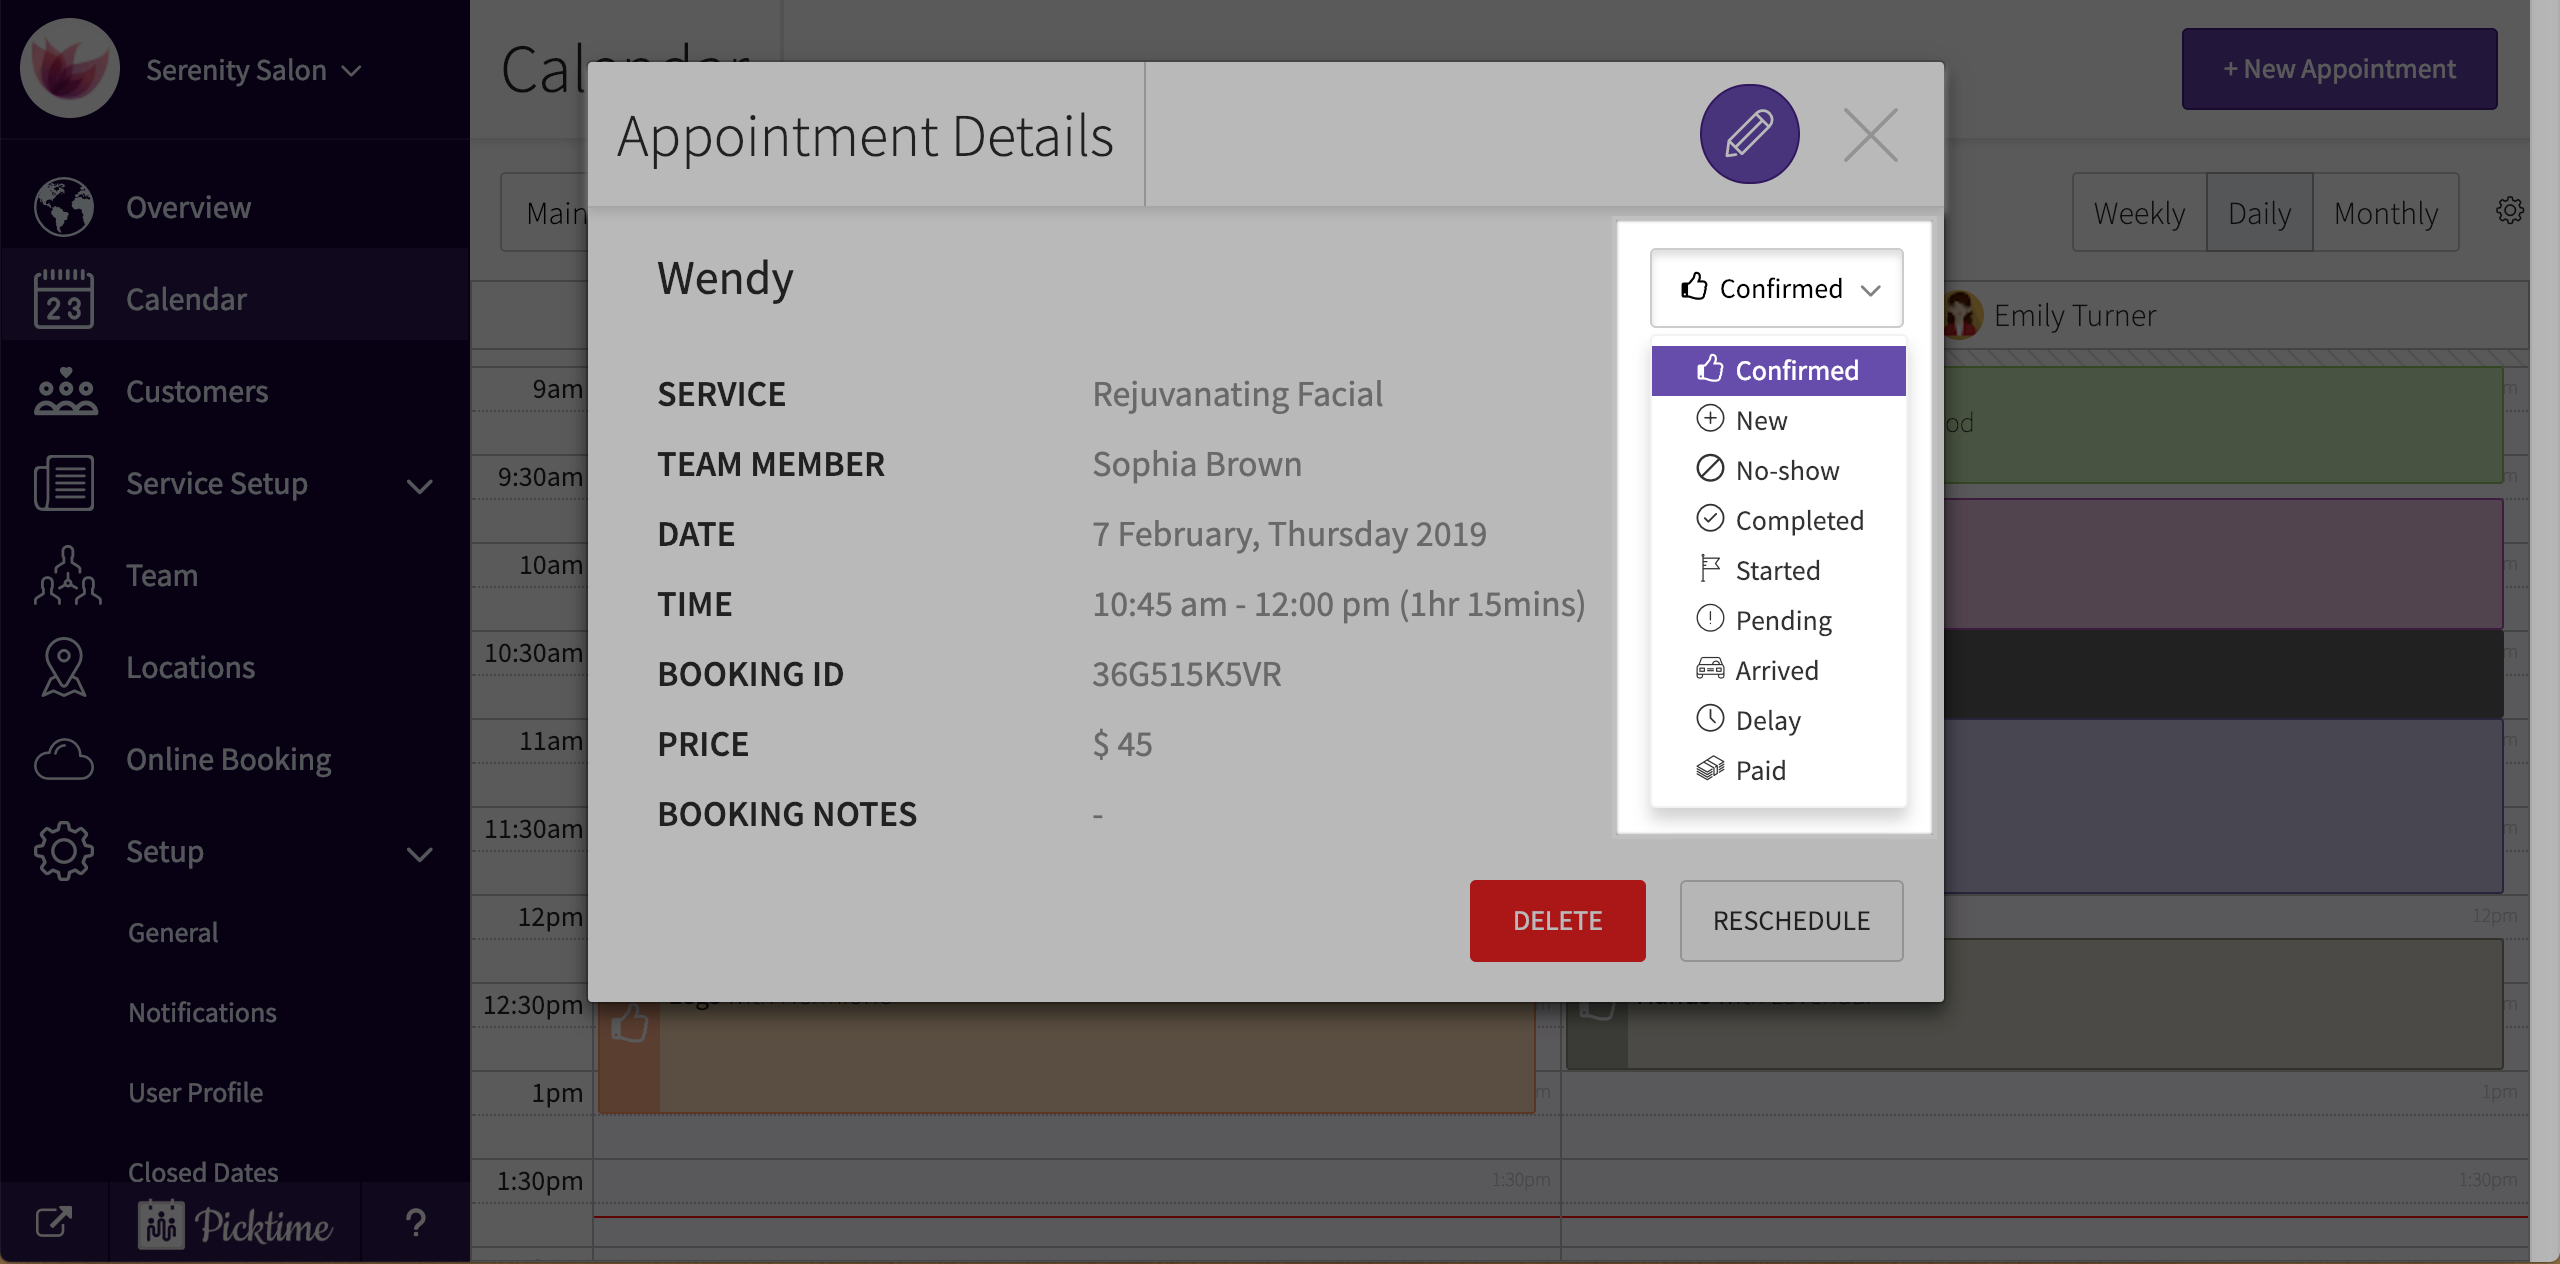
- Select whatever is apt for the appointment and close the pop-up
- You will see the status on the left side of the appointment.

Updated on: 06/03/2026
Thank you!